Today the aft lower chainplates finally went in. Unfortunately, the camera didn't make it to the boat with me today, so no pictures. After electropolishing the new chainplates looked fantastic and installing the first pair was a simple matter of masking off, applying some polysulfide, and then bolting them in place. Nice!
I also put a coat of varnish on the GPS bracket base.
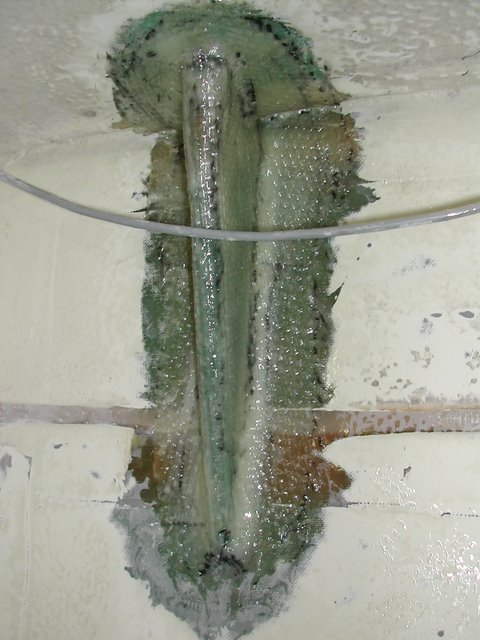
Also, I wrapped up the major glass work on the backstay chainplate knee. After 2 more layers of 24 oz. roving on the sides, several pieces of 6" 10 oz. tape over the fillets, and several lengths of 2" 10 oz. tape over the front of the knee...it's done! On my next work day I'll sand it smooth and begin locating the chainplate itself. I'll probably fair a few spots before paint.
Stay tuned for pics...
Monday, May 28, 2007
Wednesday, April 18, 2007
Chainplate update
The chainplates are out at the machine shop for fabrication, and I'm gradually wrapping up the knee replacement. The backstay knee is still the big focus. The first day of glassing I applied 2" tape to all four fillets, followed by a layer of 24 oz. to the sides of the knee. After time to gel, I cut four strips of the excellent West 4" biax tape and glassed these in over the fillets. These strips were followed by four more offset 1" to the outside.

The following week I was back. After washing and sanding the previous glasswork,I cut glass for more offset strips of biax tape, as well as more 24 oz. roving for the knee sides. I glassed these in and also ran strips of 2" tape down the front edge of the knee. Yes, I missed a wrinkle or two along the edge! With luck these will sand out ok. Otherwise everything turned out well.


 The first day of glassing I applied 2" tape to all four fillets, followed by a layer of 24 oz. to the sides of the knee. After time to gel, I cut four strips of the excellent West 4" biax tape and glassed these in over the fillets. These strips were followed by four more offset 1" to the outside.
The following week I was back. After washing and sanding the previous glasswork,I cut glass for more offset strips of biax tape, as well as more 24 oz. roving for the knee sides. I glassed these in and also ran strips of 2" tape down the front edge of the knee. Yes, I missed a wrinkle or two along the edge! With luck these will sand out ok. Otherwise everything turned out well.


Monday, April 09, 2007
Heavy glass work on the backstay knee
I spent last Saturday (4/7) working on the boat, mostly concentrating on the backstay chainplate knee. Forgot the camera, so word will have to suffice. After a thorough sanding of the fillets around the backstay knee, I laid in strips of 2" tape along the top and bottom. Next came large pieces of 24 oz roving to cover the sides of the knee, followed by strips of 4" West 15 oz biax tape along the fillets. The biax tape is great to work with: tough to wet out, but very easy to laminate as it holds its shape and doesn't unravel.
I stripped the mainsail off the boom and took a few more measurements of the gooseneck, boom length, and other rig dimensions. The aft lower knees got their final coat of paint, and I cleaned up the awful dust. The recent rebuilding of the seawall near the slip has left a lot of bare ground nearby.
I promise more pictures soon!
Wednesday, February 28, 2007
Knee replacement surgery
 The new backstay chainplate knee is going in - after a big degreasing and sanding effort in the laz I spent a lot of time fitting the core before filleting it in. Next comes tape: 2", 4" biax, offset 4" biax, 6" cloth, 12" cloth. The core is 1/2" Baltic Birch ply - it's a high quality Russian ply with 7 laminations in the 1/2" thickness. It's also void-free - at least so far I haven't found any voids.
Setting up the ground tackle
I measured out and cut the 1/2" three strand line for the anchor rode: 150' for the bower and 250' for the stern. It helps that the dock slabs are 8 ft each.

Stern anchor mount
 Picasa and Blogger seem to be hating the guts of each other and pictures aren't showing up in Blogger. I'm testing things out and thought I'd try to show a picture of the new stern anchor arrangement - that's a 22 lb standard Danforth in a Windline bracket - the rode will go under the rail to the deckpipe so deploying this anchor should take only a matter of seconds: untie the rail lashing, lift out of the bracket, and drop. It's important that this be convenient because this anchor can serve as an emergency brake if the engine fails at an inopportune moment, etc.
Wednesday, February 21, 2007


Tuesday, February 20, 2007


Sunday, February 11, 2007
 I wasn't at the boat long today and didn't do much, but I did grind out the starboard chainplate repair enough to put in 3 layers of 10 oz cloth.
 I also sanded and primed the faired repair to the port chainplate area.
One more thing - I measured the mast today. This was a major disappointment because I found out my mast is a non-standard height and is shorter than it should be. A Triton fractional rig is supposed to have a 36' mast. Mine is 33' 10" to the top, or 33' 2" to the sheave. Since the gooseneck is 2'7" off the deck, my main luff can only be about 30' 9" and it is supposed to be 33'. I'm still debating what to do because if I stick with this mast, new sails will have to be custom-made to it and I will be locked into this weird rig.
BTW, the gooseneck (actually, the tack) is supposed to be 2'9" off the deck, so the boom is low. I thought it must be.


More...

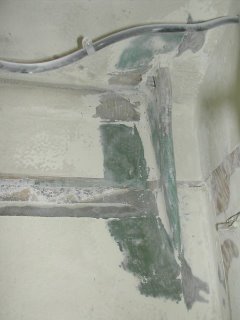
Blogger doesn't want to let me post more than four pix per post, so here are more. A couple of pictures show the backstay chainplate knee template as it approached its final form.
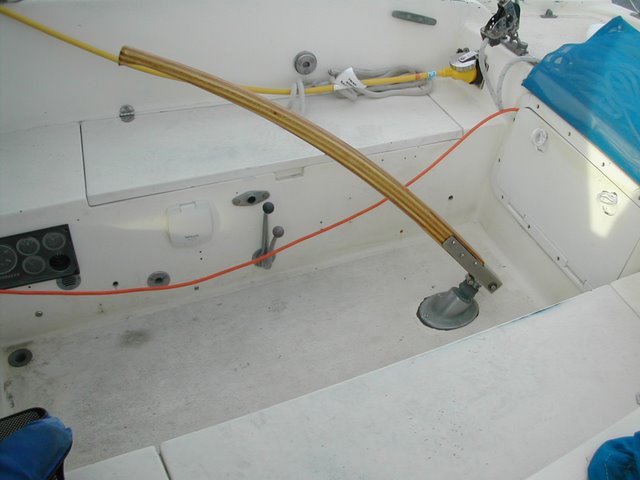
I also installed the new tiller, custom-made for Nevermind by H&M Marine Woodwork in Compton.

Karl was on Passat today working with Lee to troubleshoot a rough-running diesel, and after they got it running smoothly again we all went on a short harbor cruise. Then it was back to work for me. One small chore on my list was removing the wooden trim from the aft sid eof the main beam. This is where the hand impact driver earned its keep once again. This little tool is absolutely indispensible on a boat, where frozen fasteners are the norm. It's never failed to free up a stuck bolt for me.
In the evening I managed to get a valve adjustment done on the Westerbeke. Spec was .010" and all valves were loose; on the #2 cylinder, both intake and exhaust were .016"!
I adjusted to the correct clearances all aropund, but didn't firethe 'Beke up. Maybe tomorrow.
Other random things? I cleaned up the boat, and measured for the new main bulkhead reinforcement beams. I also templated the upper shroud chainplates which I will design this week.
Thursday, February 08, 2007
Update
 Many things going on with Nevermind these days...for one, she got all the new ground tackle. The new setup is:
Primary - a 35# CQR on 150' of 1/4" high test chain and 150' of 1/2" 3 strand nylon
Stern - 22# Danforth on 60' of 1/4" high test chain and 250' of 1/2" 3 strand nylon
The current Windline bow roller is perfect for the CQR, but I also got a Windline chain stopper for the bower and a Windline rail bracket for the stern Danforth. One of the nice ABI bronze deckpipes will finish off the stern.
I haven't got the new anchor painted yet, and the ropes aren't spliced to the chain yet, and I don't have good shackles yet...but all this is soon to come!
 The chainplate replacement is proceeding apace. Here's a view of the aft port lower knee with the new chainplate temporarily clamped to it for some test fitting. The new chainplates are 1" x 1/4" 316L stainless, fabricated by yours truly with the precision tools of an angle grinder and a drill press. It took considerable care to do a neat job but they came out great.
 To give the new chainplates a perfect clamping surface I coated each one heavily with paste wax and then created a bed of silica-thickened epoxy on the knee. I temporarily bolted in the plates during the epoxy cure. I can't wait to paint back over the knees - they look so awful right now.
 The final step is the deck filling and fairing. Water intrusion had caused some deck core deterioration around the chainplate holes, so I drilled and filled the core void with thickened epoxy. Again making sure the plates were heavily waxed, I also filled around the plates to make a fairly tight-fitting chainplate slot. Next: finer fairing and paint.
Sunday, January 21, 2007
More glass...
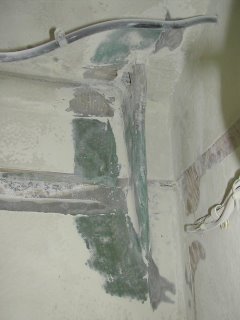
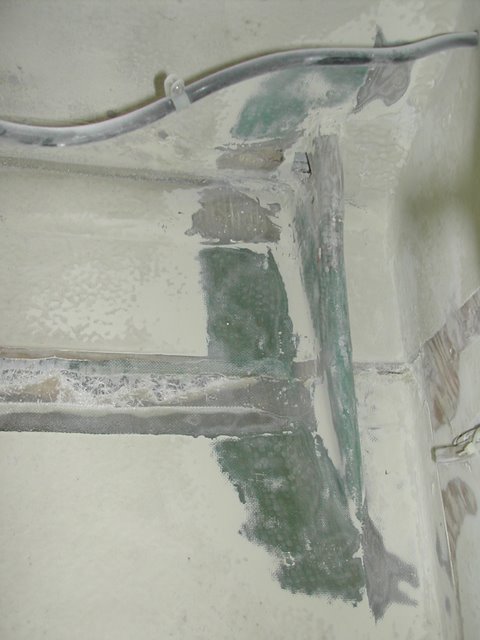
 The fiberglass work on the chainplate knees continued this weekend as I added a layer of 24 oz. roving over last week's layer of 10 oz. cloth. Now the knees are becoming smoother and looking better! There are certainly far more substantial than before. One more layer of 10 oz. and I'll be done. I would have laid up the final layer, but ran out of resin...
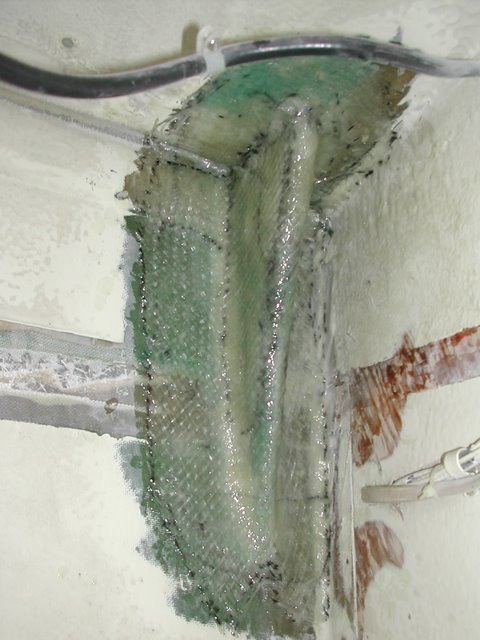
In other work, I
- Replaced the old Group 24 500CCA starting battery with a new Group 26 450 CCA.
- Replaced both engine belts - Gates 3VX350 for the alternator/freshwater/crankshaft belt, and a Westerbeke belt for the raw water pump. A 3vx-220 should fit the raw water pump, but the 3vx-250 is too long, and it's the smallest McMaster carries. There is a local Gates dealer...I'll have to drop by.
- Reinstalled the rebuilt raw water pump.
- Repaired the broken terminal clamp on the negative cable for the starting battery.
- Attempted to fit a length of fabric-reinforced Shields 1.5" ID host on the port cockpit drain & seacock. Right now I have some fairly cheesy corrugated hose on there which works fine but doesn't inspire great confidence. The big fabric-reinforced hose wasn't flexible to go on well...even when I forced the fit, it still leaked.
- Took the boat out for a 45 minute steam around the harbor...it's been a while.
Sunday, January 14, 2007
More progress on the chainplates...
 I was determined to make good progress on the chainplate replacement project this weekend, and I arrived the boat with an array of wire brushes with which to abrade the stubborn old paint into submission. Chucked up into my mighty B&D 3/8" drill, these brushes finally did the trick. They could reach everywhere and even at the low speed of the drill (1200 RPM) they made fairly quick work of the remaining paint. After a couple hours' work I declared the paint stripping done!
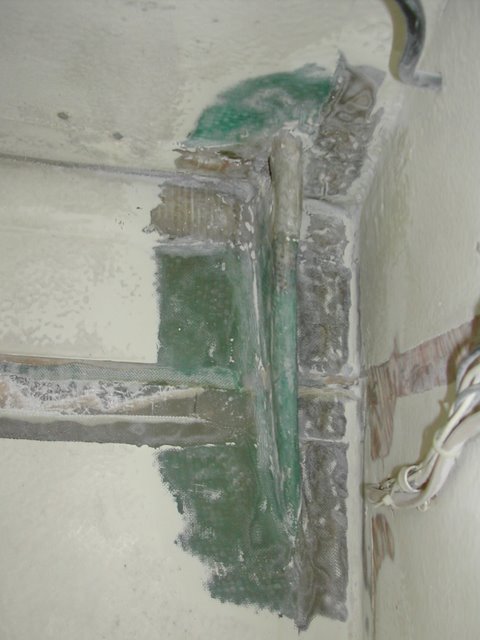


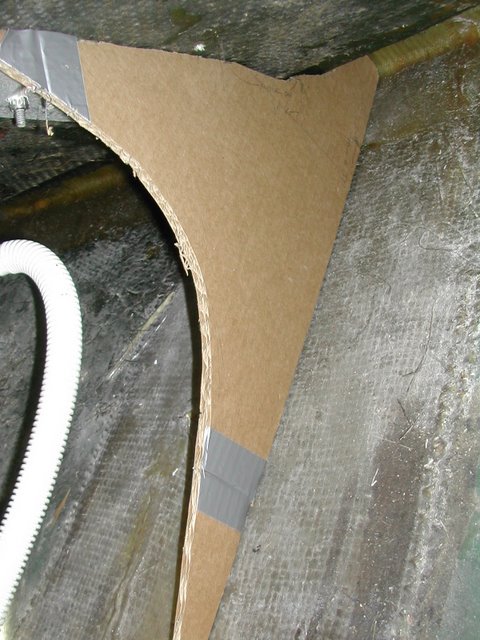
After stripping was complete, I washed down the knees with acetone and mixed up a batch of epoxy thickened with cabosil. Using a piece of cardboard cut to the proper radius, I applied the thickened epoxy to the base of the knees to form a smooth fillet - something that Pearson/Aeromarine didn't do in the original construction.
Sunday, December 10, 2006
More chainplate knee work, lead paint?
December 3rd, last Saturday...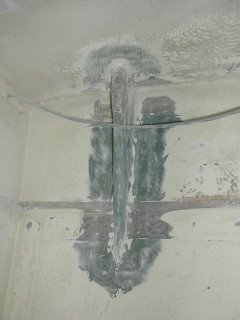
With the trusty Porter-Cable DA sander and a collection of 40 and 80 grit disks, I attacked the tough old paint around the aft chainplate knees. I don't know what Pearson used but it is tenaciously adhered and it doesn't appreciate being sanded off. In fact, the sanded paint gets even with its aggressor by creating masses of incredible dust which settle everywhere on the boat - this despite heroic ventilation attempts.
Progress was discouraging. The paint was tough and access to the chainplate knees was not good. Neither my DA or the orbital palm sander will reach the nooks and corners around the knees.
It was sometime that evening, after arriving home from the boat, that it occurred to me that the old paint I was grinding might be lead paint. I posted on the Plastic Classic forum to see if anyone else had run into the lead paint problem on their Triton. Eventually I called a local company (Channel Coast Corporation) which specializes in lead paint remediation and the like. They suggested I take samples to be sent in for lab testing, which I did - taking one chip sample from the hull paint in the head compartment, and another from the paint atop the port settee.
The first sample came back completely negative, and the second came back with .23% lead by weight - yes, 23 hundreths of a percent. Evidently the legal definition of lead paint around here is > .5% ... so, it's not lead paint, at least legally! The risk seems small at this point if I simple and prudent measures like P100 respirators and proper cleanup.

With the trusty Porter-Cable DA sander and a collection of 40 and 80 grit disks, I attacked the tough old paint around the aft chainplate knees. I don't know what Pearson used but it is tenaciously adhered and it doesn't appreciate being sanded off. In fact, the sanded paint gets even with its aggressor by creating masses of incredible dust which settle everywhere on the boat - this despite heroic ventilation attempts.
Progress was discouraging. The paint was tough and access to the chainplate knees was not good. Neither my DA or the orbital palm sander will reach the nooks and corners around the knees.

It was sometime that evening, after arriving home from the boat, that it occurred to me that the old paint I was grinding might be lead paint. I posted on the Plastic Classic forum to see if anyone else had run into the lead paint problem on their Triton. Eventually I called a local company (Channel Coast Corporation) which specializes in lead paint remediation and the like. They suggested I take samples to be sent in for lab testing, which I did - taking one chip sample from the hull paint in the head compartment, and another from the paint atop the port settee.
The first sample came back completely negative, and the second came back with .23% lead by weight - yes, 23 hundreths of a percent. Evidently the legal definition of lead paint around here is > .5% ... so, it's not lead paint, at least legally! The risk seems small at this point if I simple and prudent measures like P100 respirators and proper cleanup.
Tuesday, November 21, 2006


Subscribe to:
Posts (Atom)